Featured

UTAH ROAD TRIP | Part 1: Zion

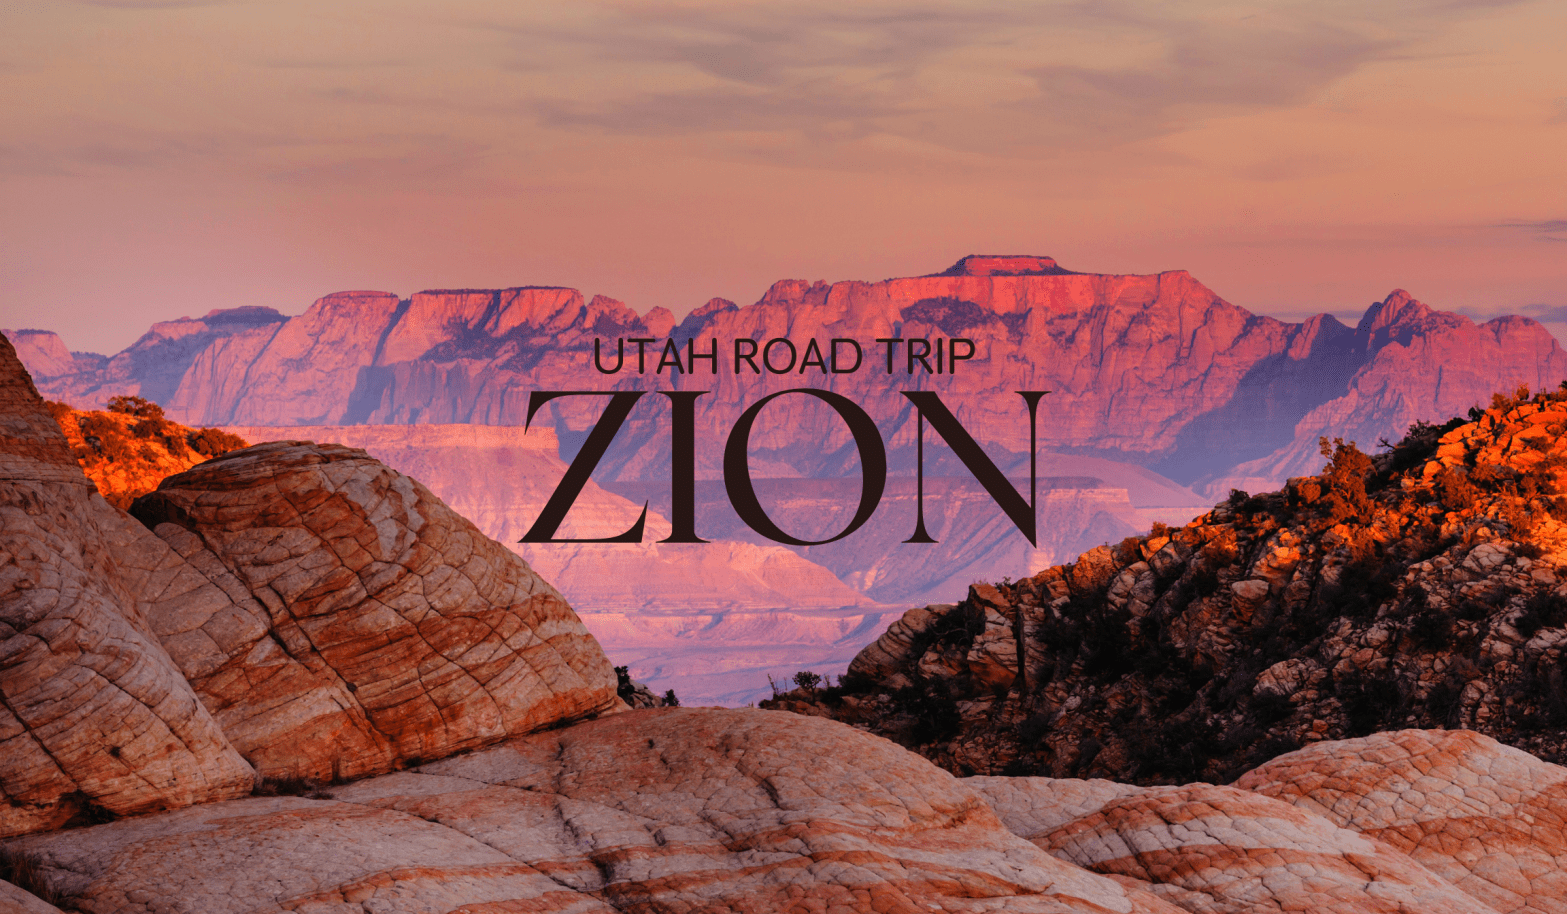
Zion National Park is one of the most sought-after gems in the US for any outdoor enthusiast, and for a good reason. The park includes nature spectacles not seen anywhere else, including the two we had the opportunity to visit: Angels Landing and Zion Canyon Narrows. Coming from the PNW, we decided to travel to the beautiful state of Utah via car in May of 2021. This was both the most flexible and viable option for the requirements of our trip, seeing as we wanted to explore the entirety of the state during our stay and had flexibility in our schedules to do so. This trip was a hybrid between staying in Airbnb’s and camping.

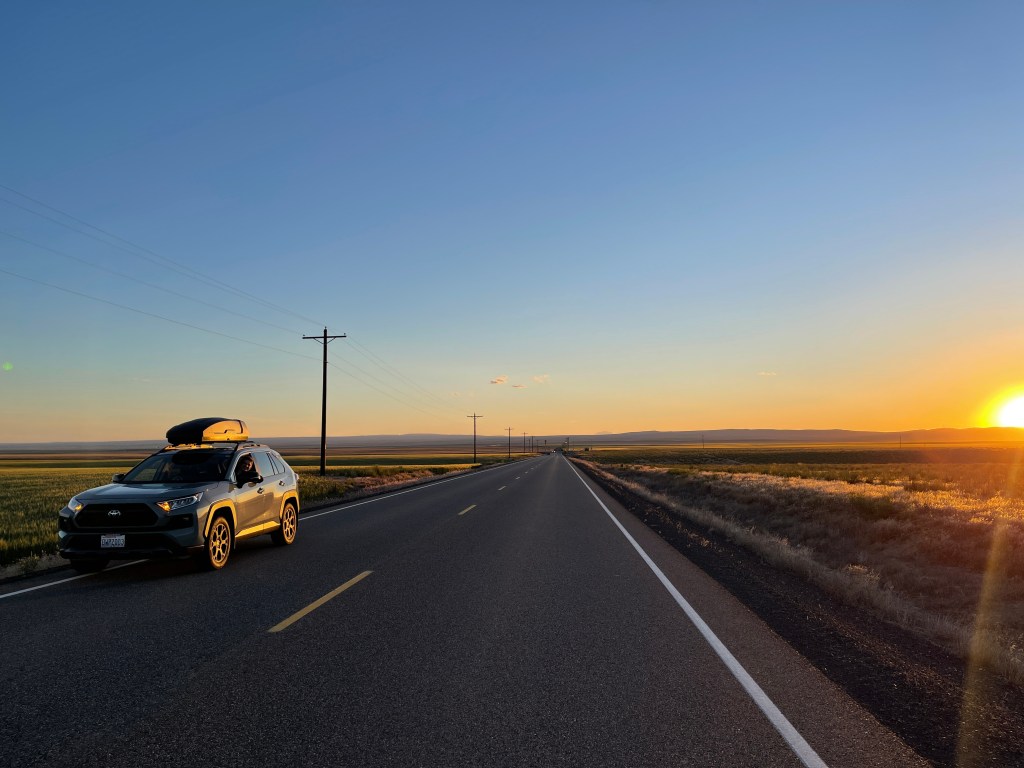
Day 1: Driving from WA to UT  

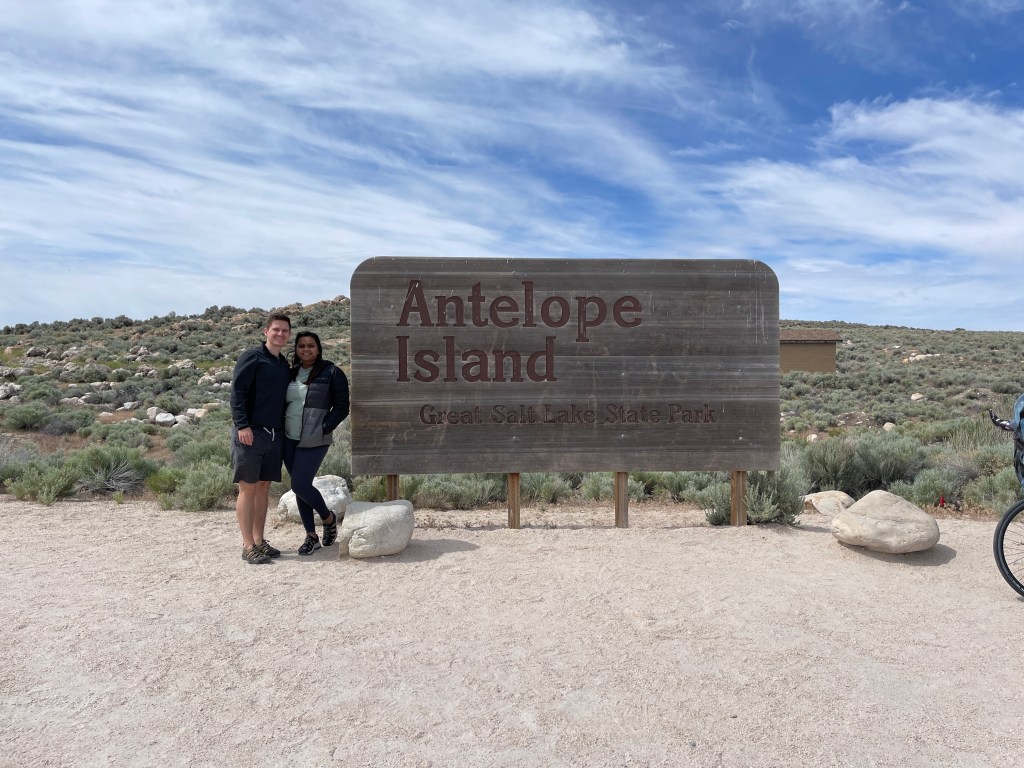
With so many amazing stops on the way the trip took us an estimated 24 hours. One of the spontaneous detours we took included Antelope State Park near Salt Lake City. It’s a wonderful island located about 20 min from the city with wildlife ranging from cayotes to bison. There are campgrounds there, and the relatively flat terrain is home to a popular bike route which is accessible to bike packers, campers, or even daily through traffic. We recommend this spot if you plan to travel through Salt Lake City and want to spend a day or two exploring the island.  

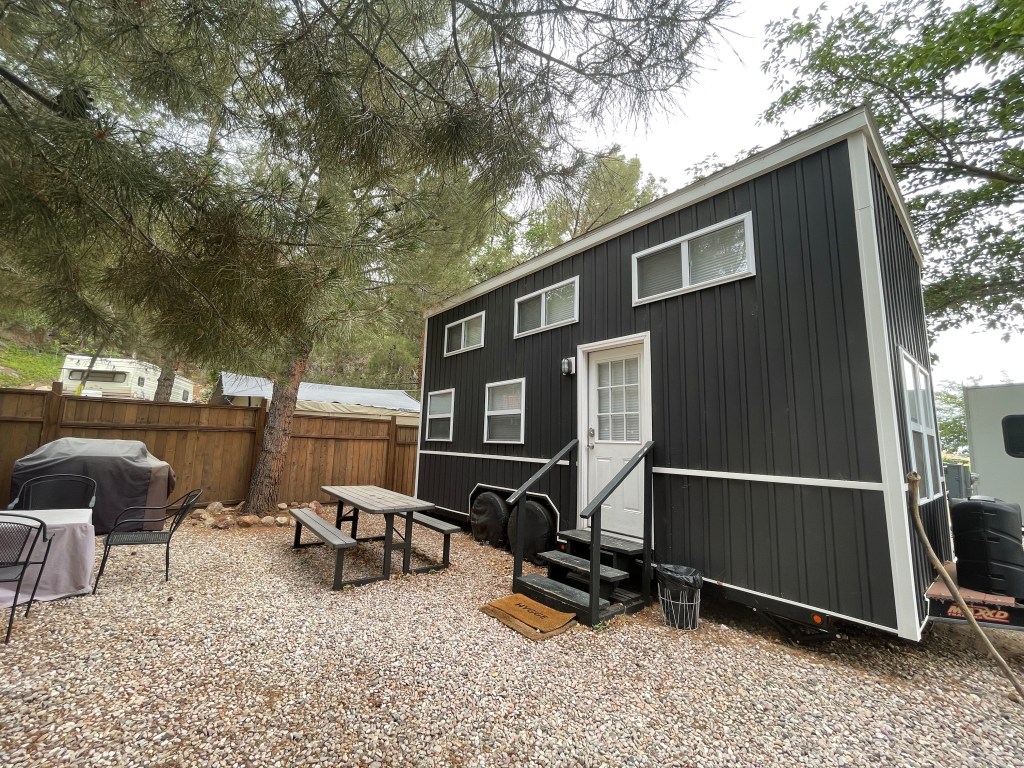
Our drive continued, as Zion National Park is still a hefty 6 hours from SLC. Our first stay was an Airbnb Tiny home (linked at the end) only 30 mins from the park!  

Day 2: Angel’s Landing Hike

Our day started early, around 4 AM. This gave us enough time to pack up and drive into the park so that we are lining up for the shuttle by 6 AM. The park isn’t officially operating at this time, so if you do make an early entrance, make sure you are prepared with your America the Beautiful pass. Parking is convenient and ample in the early morning, but it fills up quick. We saw a lot of people park outside of the park along the main road as well.

There are two main reasons why we pushed to enter the park early: 

  1. Beat the Heat – even though we were exploring the park in early season, the days still got into the 90’s. Being able to start off the day early allowed us to get back to camp before the highest temps hit. 
  1. Beat the Crowds – getting to the shuttle line at 6am did guarantee we were on the first couple shuttles, but by the time the shuttles started running (6:15am), there was a decent amount of people in the que. Additionally, after a certain ranger’s start monitoring how many are on the shuttle and regulate it.
Lne at trailhead around 10am to hike Angel’s Landing.

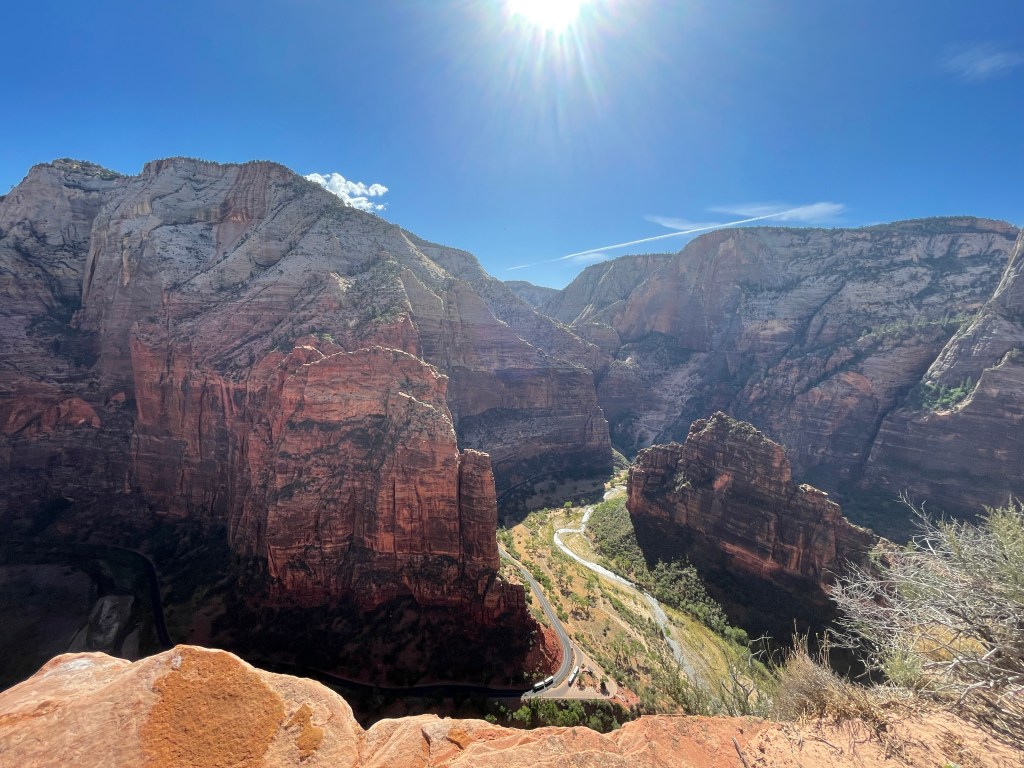
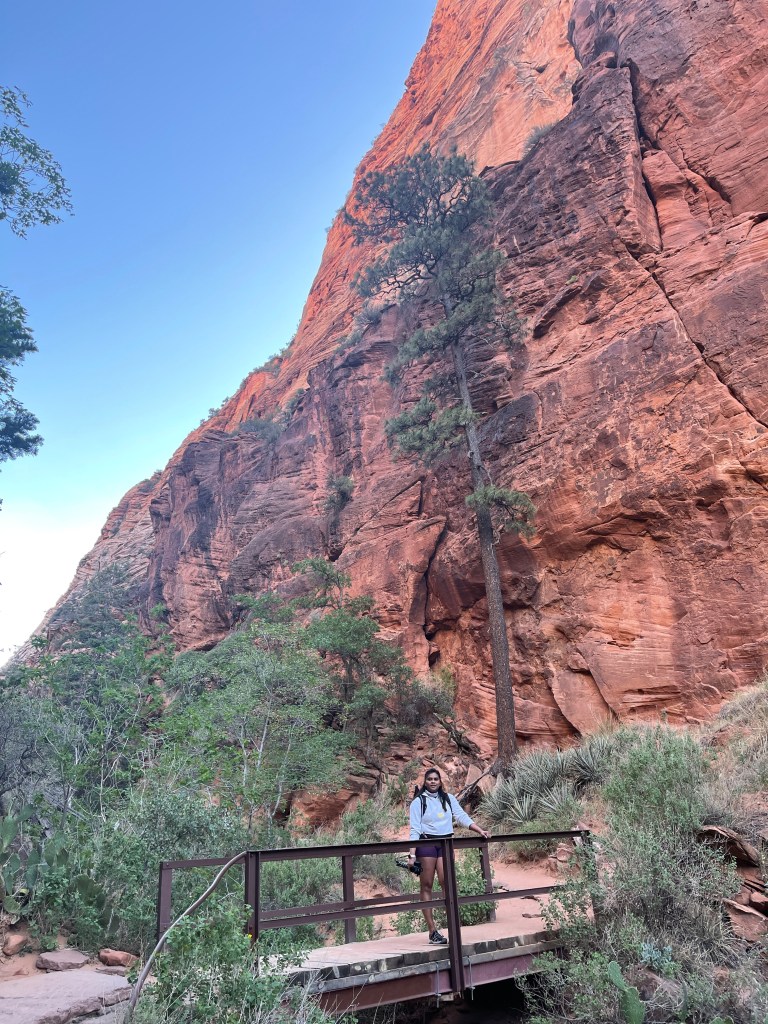
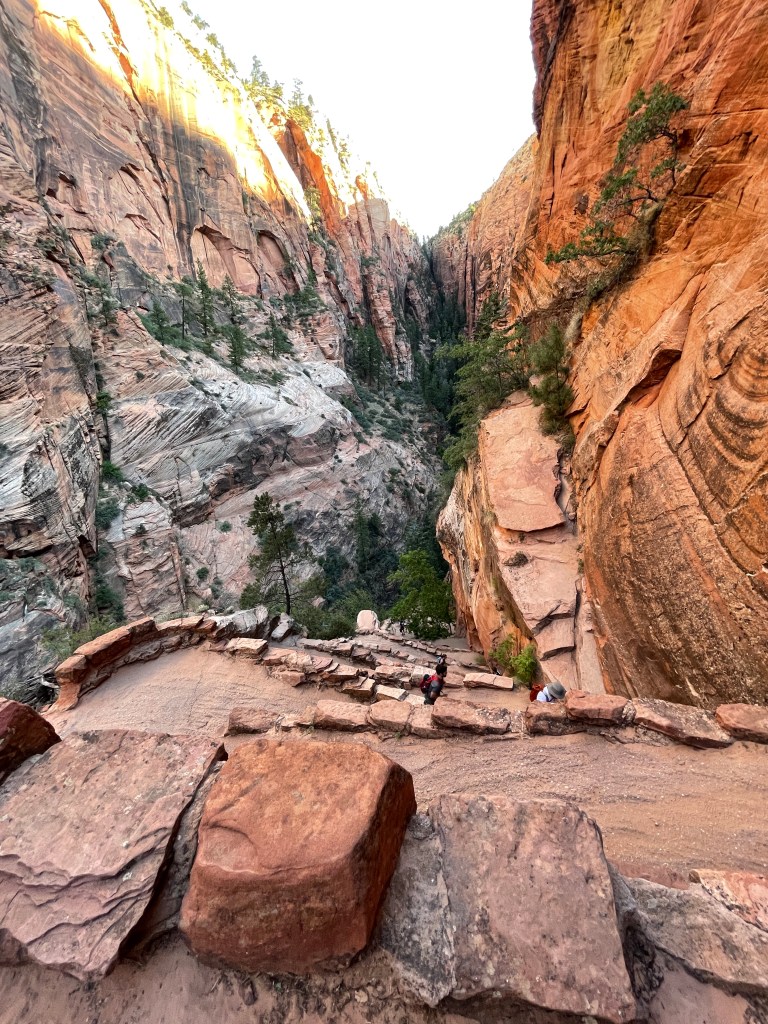
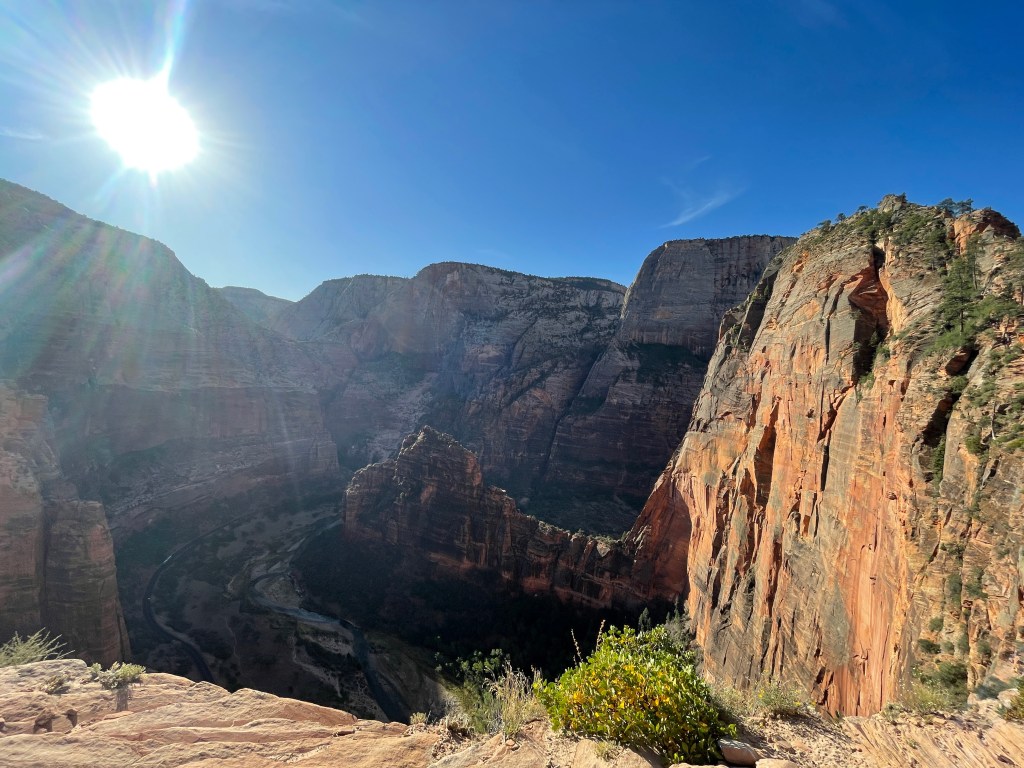
Angel’s landing is a modest 4.4 mile long hike with an elevation gain of 1604 feet. The trail ebbs and flows, with a relatively sharp incline from the get-go, flattening out once you enter the canyon, and then entering some rigorous switchbacks. Although intense at times, don’t forget to look around and enjoy the scenery! The park changes drastically throughout the day as the rock faces deflect different shades of the sun’s rays based on time of day. The last bit of the trail requires you to climb on a narrow ridge which is trafficked in both directions. Make sure to always take caution and it helps to stick with a group when it comes to deciding which direction has the right of way. Once you reach the top, you will have a beautiful view of both the big bend and canyon.  

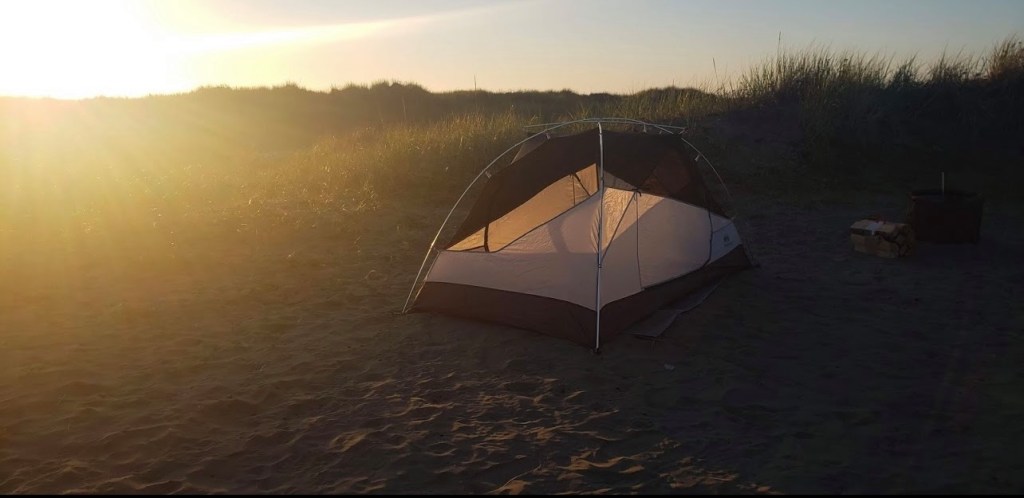
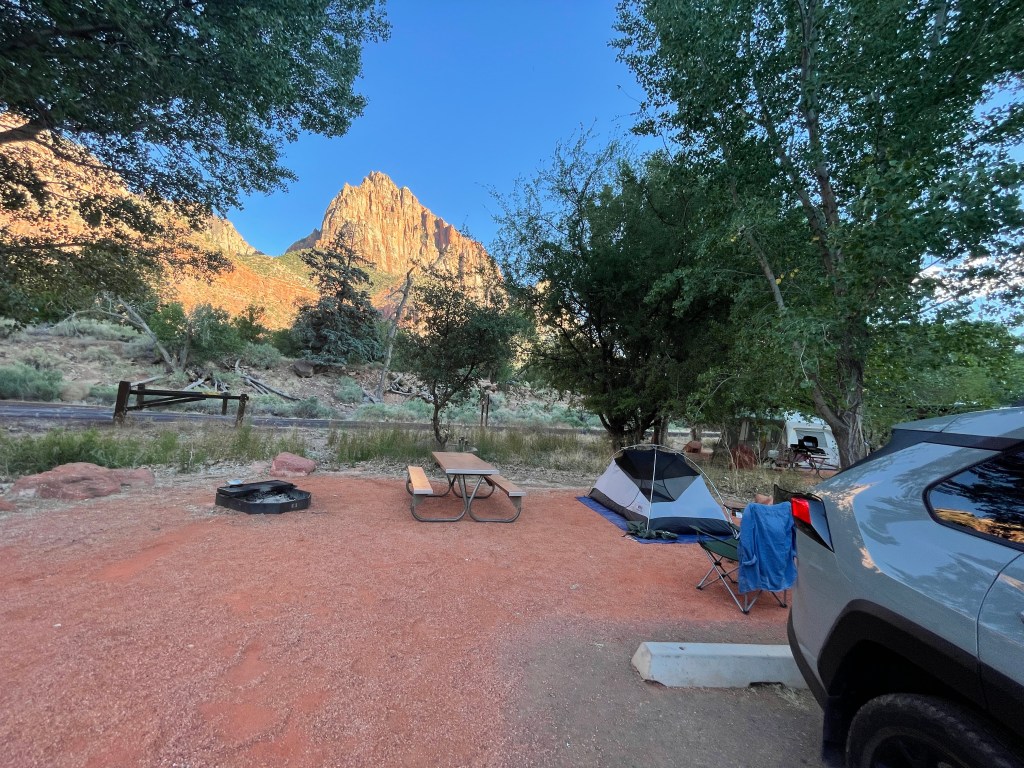
After starting the hike around 7am, it was almost noon when we came back down and was time for some lunch. After taking the shuttle back to the parking lot, we cleaned up and headed outside the park in hunt for a campsite for the night. After speaking to a few local shops, we got directed to this area (37.224055, -113.160814) that had first-come-first-serve sites on the side of the road. After a few relaxing hours later, we enjoyed a quick dinner and were off to bed at 8pm.  

Day 3: Narrow’s Hike

Traversing Angels Landing was something we were used to coming from the PNW. 8 mile hike through canyons with flowing water? Not our forte. After discussing the trail with a local rental shop the day before, we opted to rent some neat water booties! These proved to be a life saver as they were both comfortable and sturdy (linked at the end). 

Narrows trail head

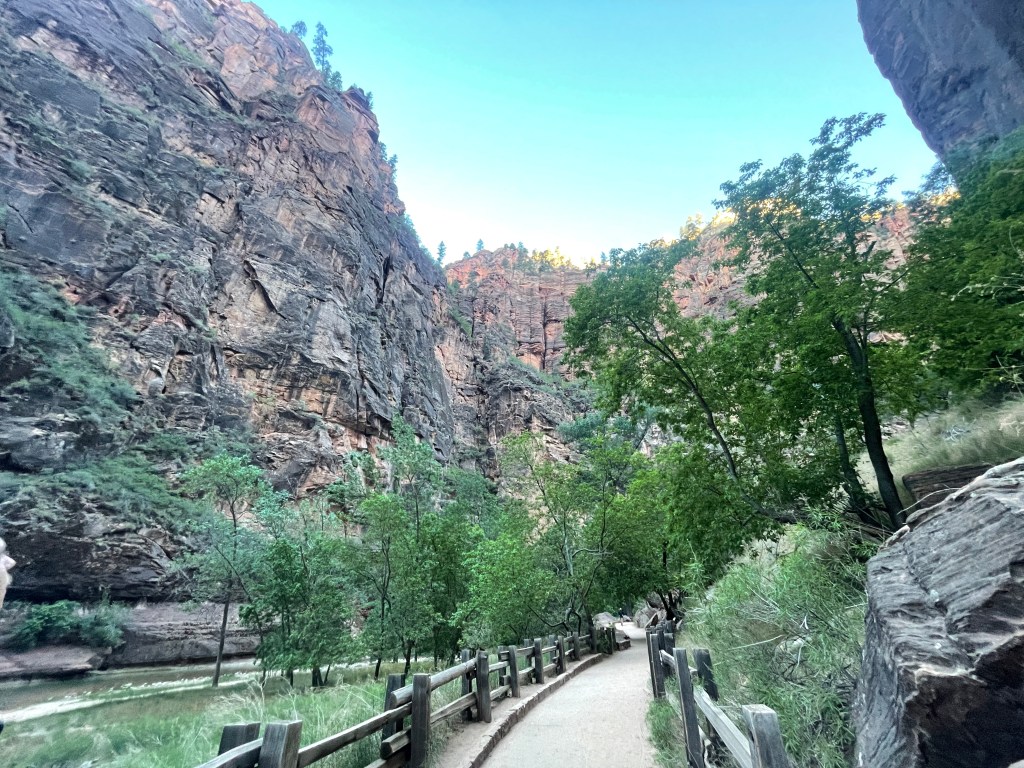
Hiking the Narrows, although more strenuous, proved to be pleasant since the temperature in the canyon is significantly lower and gets little direct sunlight. The early morning had us layering up. if you happen to enter the park later in the day, opt for the Narrows as the heat won’t be so bad. Although we did not make it all the way to Wall Street, we had a blast exploring the new form of hiking.

There weren’t parts of the trail that we did which had our packs submerged, but we still packed our things in drybags and put our phones in waterproof cases. We suggest you do the same, as traversing in the water can be unpredictable and can cause you to slip or even fall. We’re speaking from personal experience.  

____________________________________________________________________________

Overall, you need rest before and after becuase these hikes will take most of your day and are quite streneous. Stay hydrated and keep snacking throughout.

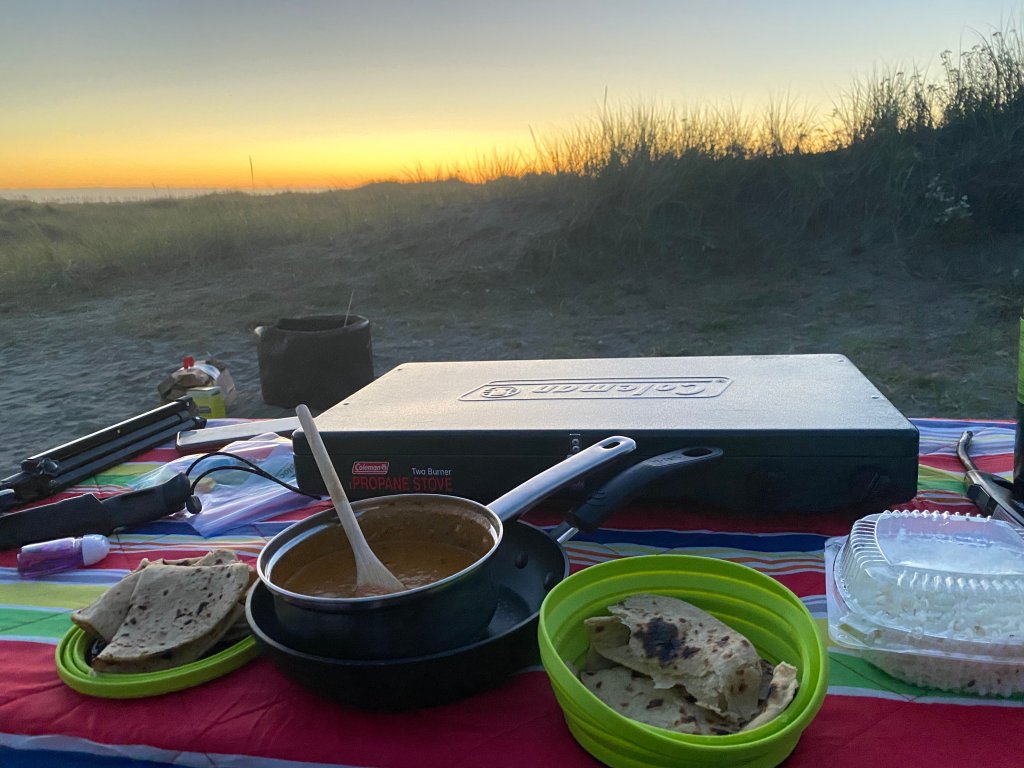
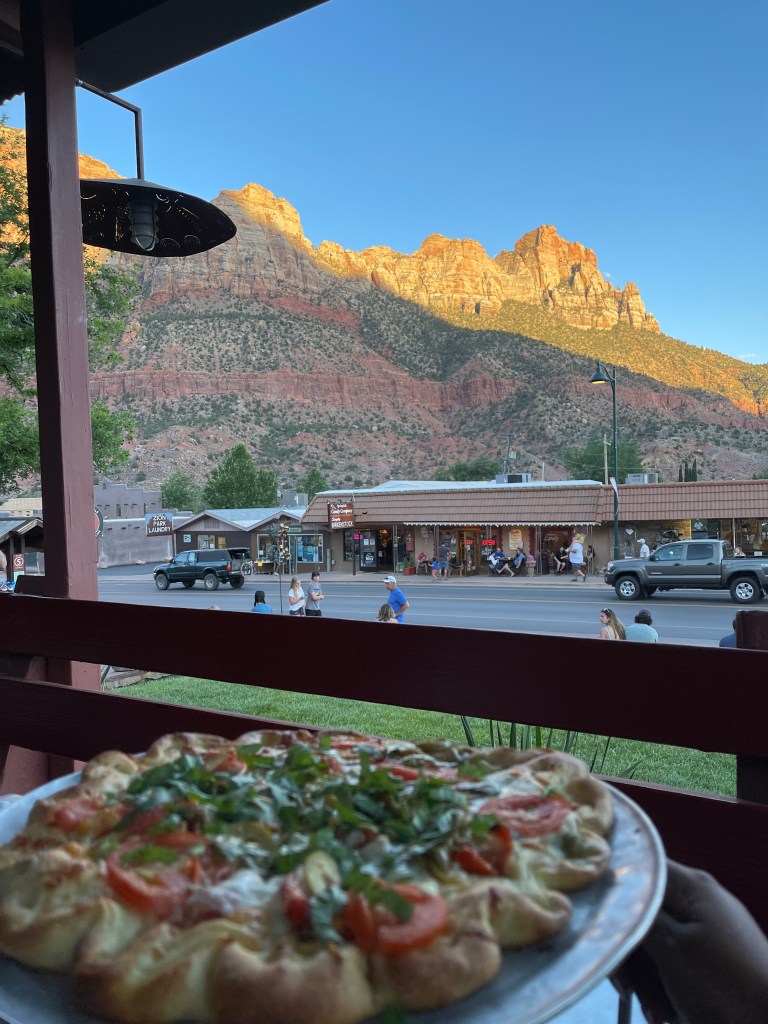
We enjoyed quite big meals for lunch after both these hikes!

Tips for Zion:

  • Proper Footwear  
    Water booties were a major help during the trip, so if you don’t have a pair make sure to check out the local shop we rented from. The staff are super nice and helpful too! 

Thank you for reading and hope this helps you plan your next trip to Zion! – K&S

COVID-friendly PNW Roadtrip

Ever since the lock-down began in March 2020 in Washington state, it has been very hard to go out, explore and have vacations. We were extremely careful once everything reopened. Few of the things we do was limit meeting people and have a specific friend and family group, quarantine at least a week long after engaging with our friends over weekend, wearing a mask all the time except when eating/drinking, and maintaining 6ft distance.

Summer 2020 was definitely a unique one, and having a lot of limitation on activities or even weekend getaways, as parks and beaches would be too packed, campsites all booked, it was getting very frustrating to be inside all the time in front of our screens.

In midst of our transition phase from end of internship to starting our full time roles, we had an overlay of week off, and decided to jump on the opportunity.

Pack your bags ‘cuz we going on a ROADTRIP!! (Our road trip began from Seattle)

Itinerary

Day 1: Ocean Shores
We left Seattle around 1pm, but stopped at Costco for some food and gas. The drive to the Ocean Shores (except the Tacoma traffic) was very calm and fun. It was around 6pm when we got to Ocean Shores. We didn’t know this, but when we got to the beach we saw all these cars driving on the SAND! It was Sans first time driving on sand – which was pretty cool. Now for the coolest part – our campsite! If you want a private beach access and view campsite at Ocean Shores, book your spot at JB’s RV Park and Campground. The host is the nicest person and super accommodating. The night was super cold and windy – so windy that we couldn’t get our fire-pit started. So bring extra layers. But the night was so peaceful and calm, you could hear the ocean waves throughout the night and even in the morning.

Day 2: Oregon Coast
Next day was very interesting because the morning was a bit gloomy and chilly. Sans had to do her internship presentation while we were at the site. So while Sans was presenting, Kacper was cleaning up and packing so we were ready to head out. Our stop for the day was Canon Beach (128miles). We highly recommend this iconic site! We had a small picnic on the beach under the sun, and Sans accidently took a very LONG nap. It worked out in our favor because we avoided the harsh sun. Kacper went in for a swim (not a good idea-cuz it was very cold) and we just walked down the beach and took in the fresh air.
Left from Canon Beach and started driving to the Tillamook Creamery. We didn’t have a reservation, so we were kind of winging it. As we started getting closer to Tillamook, Sans started calling campsites to check availability and found one! The campground is called Camper Cove RV & Campground. It is a little (15mins) far from the creamery, but it was the prettiest site right next to a creek and super private as well. However by the time we did get here, it was starting to get dark, so we saw most of the site in the morning 😉
Night stay: Camper Cove RV Park & Campground (51.8 miles)

Day 3: Nature Wonders
This day had a sad start – We finally had network so Sans checked her email and had her OPT rejected due to an electronic signature (lame, right?). So she was a bit sad that day, but she put on a smile and decided to continue with our trip as planned. Our first stop was Tillamook Creamery (unfortunately you had to reserve a spot due to COVID – and of course we didn’t realize to check earlier). Didn’t get a chance to go in, but we got some BOMB lunch from there – including ICECREAM!
Since we had a busy day today, we headed out to Devil’s Punchbowl (63.3 miles) – which was SUPER cool but VERY WINDY. When we were getting out of the car, the wind pushed it out and almost hit another car, so watch out! We finished the rest of our lunch from the creamery here and headed out to the next stop.
Next stop was the Thor’s Well (35.2 miles). Sans is a Marvel’s fan so of course we had to check this out. Surprisingly there were a few people without masks – so we were a little cautious. There is a small cute hike to the Thor’s well up from the road where we parked. Be careful – it gets extremely cold and windy. We surprisingly spent like 3hrs here, because its so mesmerizing.
But we had to be at our campsite before sunset, so we headed out to Eel Creek Campground (again booked it last night).

Day 4: Sand Dunes & California
In the morning, we realized that we were camping right behind the Sand Dunes and there was an internal trail with the access to them. But before we get to that, it had been 4 days of us been without shower, so we decided to wash our hair at the site because they were getting greasy. But the reason we’re mentioning this is because we decided to go to the dunes with our wet hair – DO NOT DO THIS! The dunes were AMAZING and literally no one was there.
Today was supposed to be a little relaxing because we had a bit of driving to do. We found this Secret Beach on our way and we decided to go have a picnic here. It was a small but steep hike. We got an entire beach to ourselves!! The water was a bit cold, but not too bad.
After spending some time, we decided to head out to CALIFORNIA! Now we didn’t go far into the state, just barely over the boarder. The drive towards the end is beautiful as you start seeing the big old Red Wood trees. We got a private campsite at Kamp Klamath – the least favorite on this trip. The sites were close together and there were loud large groups, so not ideal for us.

Day 5: Red Wood Forest & Crater Lake National Park
Today we had a long day of driving back up to Oregon, so we decided to have an early start and visited the Klamath Tour Thru Tree (3.4 miles). We barely fit our car through the tree!! We left a little donation for the family who maintains this attraction and headed out to Crater Lake (210 miles)! The drive was so LONG!
We went into the park to go checkout the lake (we both had been there before), but didn’t spend too much time there as there were way TOO many people and not all people were wearing a mask.
You are not gonna be surprised, but we didn’t have a reservation for a campsite, but luckily few people didn’t show up for their sites and we got one at the Poole Creek campground. It was beautiful and quiet site and really enjoyed some hammock time at the site. It was a great way to spend our last night.

Day 6: Back Home (August 29th)
Our last day out in Oregon, we decided to do a hike – Watson Falls (16 miles). When we got to the trail head, it wasn’t much crowded and quiet. The trail isn’t too hard – unless you try to get to the bottom of the big falls. If you are debating to do a hike or not – definitely should do this one as its GORGEOUS and quick!
After the hike, we decided to head back home to Seattle – after a whole week out on the road. P.S. Kacper made Sans pull over just so he can take a photo of himself with the sheep!

Things to Consider

  • You can plan your campsites on fly as you have tons of options from public and private campsites.
  • Due to COVID a lot of museums and things like that now require reservations, so book ahead if you can.
  • We didn’t visit many National Parks, but if you are planning to, invest in the America The Beautiful Pass.
  • Keep your meals easy for camping. We usually stuck to croissant egg sandwiches or oats for breakfast and dinner usually involved some pre-packed lentil curry packets from Costco and had some pre-cooked rice.
  • We chose not to eat out, as we weren’t comfortable.
  • Pack sanitizers and disinfecting wipes.
  • Pack a small tripod, so you don’t have to ask people to take your pictures.
  • Have fun and make it yours!

If you enjoyed this, like and share! Comment down below what your favorite day on our trip was and what you would want to see more of! – Love K&S

5 Days in LA!

Itinerary – What to do in LA?

We suggest to mix up your itinerary with museums, guided tours, self exploration, relaxing time, etc. whatever suits your purpose for the trip. For us, it was about exploration, enjoying little things and the classics. Here is our day to day itinerary:

Day 1: Fly in and settle in!

We flew in in the morning around 9:00 AM, however our Airbnb was not available until later in the day, so we ended up having breakfast at Roscoe’s House of Chicken n Waffles. Walked around the blocks by our Airbnb. After settling in, and taking a mini nap, we decided to head out to Secret Swing Angels Point and explored Elysian Park and watched the beautiful sunset. Ended our day by grabbing some tacos at Leo’s Tacos Truck.

Morning take-off from Seattle, to landing in Los Angeles
Secret Swing Angels Point
Sunset from Elysian Park

Day 2: Santa Monica

Day to relax after our flight! We explored the Santa Monica Pier and enjoyed some beach time! There is so much to explore on the pier, check out the Pacific Park and tons of local performers. Make sure to stop by Fritto Misto for some delicious brunch!

Day 3: The Broad and The Penthouse

It was time to head into downtown and explore The Broad. We spent more than 2 hours walking around. The general admission is free and great if you love art! From there we just walked around downtown and had lunch at Vespaio.

We headed back to our home to rest up and got dressed for date night dinner at The Penthouse. Be sure to try their cheese platter! We suggest that you reserve around the sunset time for an amazing view.

Day 4: Hollywood, Griffith Park and Laugh Factory

We headed to Hollywood, walked around Walk of Fame. We got there sometime around noon, so was extremely crowded. To avoid this, go in as early in the day as you can! We also grabbed lunch and drinks at Hard Rock Cafe.

After spending few hours in Hollywood, we headed up to Griffith Observatory. The city views from this place are magical! Do stay until its dark to see the city lit in night lights. It does get cold in the evening (even in peak summer time), so make sure you have a spare layer.

To wrap up our day, we decided to catch a live stand-up comedy at Laugh Factory. Highly recommend this if you enjoy stand-up and want to experience it in a classic Hollywood style! Special shout-out to @iamtehran for being an awesome host at our show and making us laugh, cry, and laugh some more.

Day 5: La Brea Tar Pits and Museum, The Grove, and The Original Farmer’s Market

After having a hearty breakfast we headed out to The La Brea Tar Pits and Museum. It’s a perfect getaway to Ice Age right in the heart of LA! Family friendly and very engaging.

Then we rode on the electric scooters and headed over to The Grove. Here we walked around shopping and saw the beautiful water fountain that sits in the heart of the place. From here we headed across the street to The Original Farmer’s Market for late lunch/dinner. There are SO many options! Oh, and do stop for ice cream at Local Ice.

“How do you plan under budget?”

Our very first out of state adventure was spring break trip to LA, California! Well a lot of our family and friends always asked us, “How do you afford a week long vacation to LA as college students?” Well its easy if you plan ahead and find affordable, yet fun things to visit and do. Today we will share how we planned the LA trip under $600 together!

This post is broken down into 4 main categories:

  • Flights
  • Stay
  • Transportation
  • Meals

Lets get to it shall we?

Flights – How to find cheap air fare?

In our case, flight tickets were the most expensive part of this trip and the reason is because we waited too long to book them! Initially we had planned to book our flights by end of January for end of March trip. The flight tickets then was $150/person round trip. However, due to few reasons we had to book the flights at later time and ended up costing us around $230/person. So we learned our lesson to say the least. But you might be wondering, where do you look for flights?

Well, let us tell you a secret… don’t use Expedia, CheapAir and all those sites that pop up on your google search. We suggest using Hopper. Here you can watch and monitor flights ahead of time, it notifies you when the prices are low or high, it also comes with cheap insurance for a guaranteed money refund (compared to air points that most airlines give) if you do have to cancel your trip for any reason. We continue to use hopper and has never failed us.

Stay – Finding the perfect home for your vacation

Like everyone else, we relied on Airbnb and Vrbo to find our perfect home for the week. The key in finding affordable place is to look a little out of the main city area. For example, we were visiting LA but homes in the heart of city are expensive to say the least. Other key factor is to make sure the listing has tons of reviews, and real photos. It is very easy to get fooled by amazing looking photos! Be careful.

As to where we exactly stayed, this is where we stayed. We spent $655 for 6 days, 5 nights stay between 4 of us, so it came to $164/person for a week long stay (which is about $28/day). This apartment was super comfortable, had all the basic amenities and was fairly equal distance from LA Downtown, Hollywood, and Santa Monica. Lots of local food trucks and restaurants around the apartment as well.

Transportation – How to get around the city?

We had couple of options when it came to traveling around the city: rental car, public transportation or Uber/Lyft. As none of us were 25yrs or older, renting a car was costing us more than our week long stay. As to public transport, in LA you can get a Metro Pass.

Once we got to LA we realized that waiting on public transport and its schedule, we would waste a lot of time idling. So we ended using Uber and Lyft to get around, and was so much cheaper as we split the ride 4 ways. The cost we individually spent on Uber/Lyft rides was around $30 for the whole week.

Take time into consideration. Because there were 4 of us, and we didn’t want to wait on public transportation, and so Uber/Lyft was the cheapest and fastest option to get around the city for us.

Meals – What to eat?

This is a very personal decision, depending on how much of a foodie you are, how much you want to spend on food and food options around you. We had looked at couple of restaurants and food trucks a head of time around the places we were going to visit. We usually ate breakfast at home (cereal, avocado toast, etc.), had lunch and dinner out or had leftovers the next day. Throughout we spent about $25-40/person each day on food depending on where we ate.

Here are the places we ate at throughout the week:

Gist

While many factors impact the cost of your vacation and trip, these 4 are what impacted our trip the most!

Key points to help you have fun yet not so expesive vacation:

  • Plan ahead of time!
  • Book flights at least 1.5months ahead.
  • Have a rough itinerary on places you would like to visit, and based on the whether you can plan your actual day.
  • Do a basic grocery run when you get to the place (milk, cereal, bread, eggs, whatever you can use to snack on or have breakfast at home before you head out)
  • Importantly don’t stress! The point of this trip is to enjoy, so even if you don’t check off everything on your itinerary list, its okay because you now have something to come back for!
  • Keep track of expenses in excel, weather you are traveling alone, as a couple or a group. It’s important to have a sense of how much you spend, and to check if you are over spending on things that aren’t necessary.

Overall we ended up spending $300/person on our week long trip to LA as college students!

We hope this guide will help you in planning your next trip under budget! Do share your thoughts with us.

Don’t forget to check out our ‘5-Days in LA!’ blog for a detailed itinerary of your trip.